

The GT-20 rail flaw detector is the third generation of Goworld's all-digital products with TFT color display and lightweight trolley used for railway system.
The GT-20 rail flaw detector is the third generation of Goworld's all-digital products with TFT color display and lightweight trolley used for railway system. In accordance with TB/T 2340-2012 UT Rail Tester standard issued by Ministry of Railway(China), this equipment is capable of the detection job for rails ranging 43~75kg/m in type. It efficiently spots various flaws at head, waist and flange of a rail, applicable to railway, high-speed railway and subway. The instrument adopts the mode of ultrasonic host + operation terminal and connects via wireless WIFI. While improving the customer's operation experience, the instrument's Internet plus function can be expanded to realize variety of functions such as human-machine detection separation, data online, offline real-time storage, GPS positioning, data cloud storage, etc. And you can customize your own ultrasonic operation terminal according to the customer's own need.
Features:
● Trolley frame is compact, durable and easy to maintain.
● Large-capacity integrated toolbox water tank.
● Integral lifting probe holder, probe is easy to remove and replace.
● Small size and portable, with industrial three-proof touch panel.
● Excellent performance indicators, in line with relevant standards.
● Support GPS positioning, data cloud storage, automatic speech recognition and other functions.
● A functional application that meets the needs of flaw detection.
Structural features:
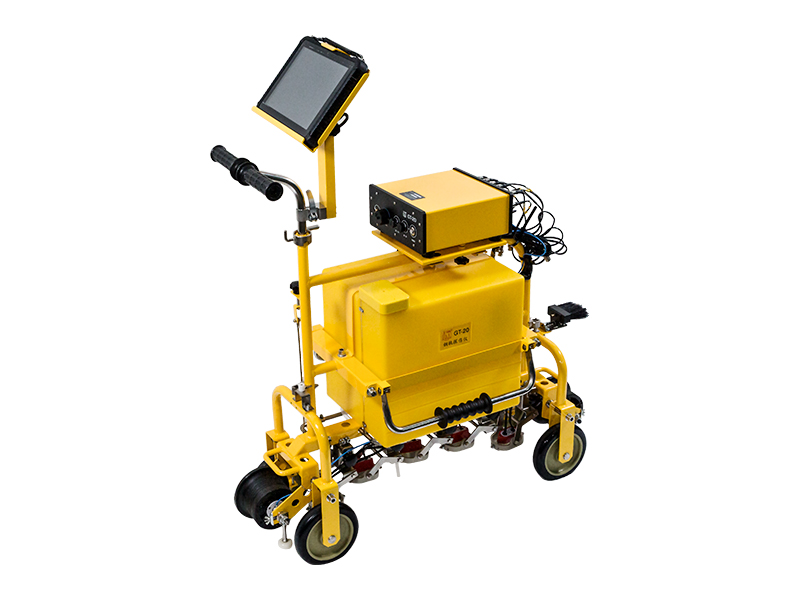
>Trolley appearance structure
Trolley frame features: compact, durable and easy to maintain.
>Instrument appearance structure
The instrument is small and portable, the overall dimensions: 94X222X225mm, net weight is about 1.8kg. The rear panel of the instrument has WIFI antenna, wired network port, power supply and switch interface. Instrument front panel, 10 channels: 9 detection channels, 1 calibration channel.
>Large-capacity integrated toolbox water tank
The plastic water tank, filled with water is 20L.
>Integrated probe holder
All the probes are closed at the bottom of the trolley, which can be lifted or removed in a single way, and the probe can be removed and replaced more conveniently.
>Industrial three-proof tablet
Industrial three-proof touch screen tablet, dustproof, waterproof and shockproof.

Application software:
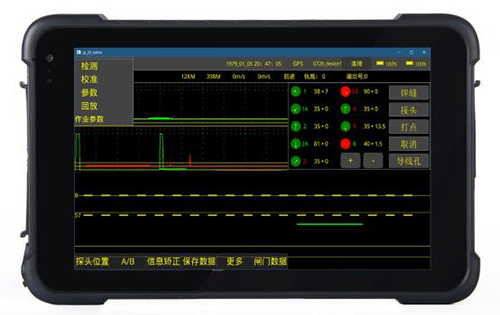
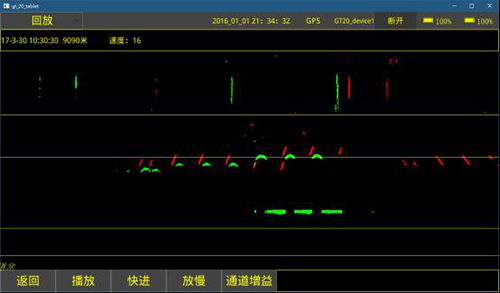
>Instrument-specific flaw detection application software
For the operating characteristics of the touch panel, specially designed application software makes function selection and parameter adjustment easier.


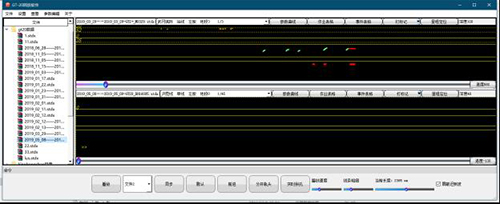
>Computer flaw detection data playback software
Data playback speed is adjustable, supporting intelligent playback, event screening, statistics, data search, printing, export and other functions.

| Channel | 10 channels: 9 inspection channels and 1 calibration channel. |
| Probe type | Different angle Dual-element probes with frequencies between 2- 2.5 MHz, including six 70° probes, two 37° probes, and one 0° probe. |
| Receptacle | Q9 |
| Probe arrangement and detection area | Comprehensive detection of damage to all major parts of the rail, including: two 70° probes scan the left side of the rail head; two 70° probes scan the middle of the rail head; 2 70° probes scan the right side of the rail head; two 37° probes scan rail waist(screw cracks and other oblique cracks); one 0° probe scans the rail head, rail waist, rail bottom, screw hole horizontal crack. |
| Frequency Range | 1.5MHz~3.0MHz |
| Gain | 0~80dB |
| Rejection | Off, large |
| Dynamic Range | Not less than 16dB with min rejection, 2~6dB with max rejection. |
| PRF | 400Hz per channel |
| Displaying Mode | A-scan\B-scan\A+B scan |
| Detect range | Can be adjusted manually or automatically according to the selected rail type. |
| Attenuator error | Operating error per 12dB does not exceed ±1dB. |
| Vertical Linerity error | ≤1% |
| Horizontal Linearity error | ≤15% |
| Amplifier band | -3dB 1.5MHz~3.0MHz |
| Blocking range | ≤20mm |
| The effect of suppression state on measurement results | When the suppression of the instrument is in different states, the amplitude difference is 10 dB±2 dB, the change ΔM of the difference between the two echoes is not more than 2 dB. |
| The effect of operating voltage on echo height and flaw detection (alarm) sensitivity of flaw detector | Within the rated operating voltage range, the gate position and alarm level of the flaw detector should be no significant change, and the variation of the echo amplitude ΔNd and the detection (alarm) sensitivity change ΔSd are not more than 1 dB. |
| Digital sampling error | The maximum to minimum signal amplitude variation should not be greater than ±5% of the screen height. |
| Digital flaw detector response time | The response time of the digital flaw detector should not exceed 5ms. |
| Distance amplitude characteristic | The transverse wave probe detects transverse holes with the same aperture and different sound paths; the 0° probe detects the large flat bottom with different sound paths, and the difference ΔW of the reflected wave height should meet the following requirements: 0° probe: ΔW ≤ 12dB in the range from the depth of 20mm to the highest range of the range amplitude characteristic curve; ΔW ≤ 8dB in the range from the highest point of the distance amplitude characteristic curve to the depth of 150mm: 37° probe: ΔW≤12dB in the range from the depth of 20mm to the highest range of the range amplitude characteristic curve; ΔW≤8dB in the range from the highest point of the distance amplitude characteristic curve to the depth of 150mm; 70° probe: ΔW ≤ 12 dB in the range from 10mm to 70mm corresponding to the detection depth. |
| SNR | 0° probe: Detect the bottom surface on the GTS-60 test block, when the wave height reaches 80%, the static sensitivity margin is greater than or equal to 24 dB; the signal-to-noise ratio is not less than 16 dB. 37° probe: detect the screw hole and the 3mm upper crack at 37° inclination on the GTS-60C test block, make the two waves equal, when the wave height reaches 80%, the static sensitivity margin is greater than or equal to 22dB; signal-to-noise ratio not less than 8dB. 70° probe: On the GTS-60 test block, the secondary wave is used to detect the φ4mm flat bottom hole. When the wave height reaches 80%, the static sensitivity margin is greater than or equal to 20dB; the signal-to-noise ratio is not less than 10dB. |
| Sensitivity Surplus | 0° probe: detect the 110mm bottom surface of the WGT-3 test block, when the wave is as high as 80%, the sensitivity margin is not less than 36dB; 37° probe and 70° probe: Detect Φ3×65 transverse through hole on WGT-3 test block, the sensitivity margin is not less than 40dB when the wave is as high as 80% |
| Dynamic flaw detection capability (defect detection capability) | Dynamic flaw detection capability (defect detection capability) With 0°, 37°, 70° rail-specific probes, all manual defects on the rail comparison test block GTS-60 except the 15° downward crack can be found and corresponding alarm indications issued. |
| Alarm gate adjustment mode | The starting position, width and level of the alarm gate can be adjusted manually. |
| Alarm mode | Real-time alarm (progressive wave, regressive wave); Screw hole double wave alarm; Delay one out of two alarm |
| Alarm indication | Sound and light alarm mode, alarm volume and frequency can be adjusted. |
| Waveform measurement | Automatically measure and display the highest wave sound path, horizontal and vertical distance in the gate. |
| Gain curve | User can adjust the gain curve (8 points) according to actual needs. |
| Flaw detection record | Full data record (up to 50 km), data can be exported and played back, and the data format is compatible with GT-2+ models. |
| Operation input method | Touch screen input |
| Display | Resulotion1280×800 |
| Touch screen | Capacitive, high-strength, scratch-resistant, support handwriting |
| Ports | USB 2.0; LAN 100Mbps; WIFI 802.11 a/b/g/n; Bluetooth BT 4.0 |
| Power | DC 12V (lithium battery pack) |
| Working time | ≥8h |
| Water tank capacity | ≥20L |
| B type image display accuracy | Both ordinate and abscissa are 2mm |
| Code wheel accuracy | 2mm |
| Flaw detection speed | Max 5.0km/h |
| Working temperature | -15℃~45℃ |
| Dimension | The overall dimensions of the vehicle in working condition are about 780mm × 290mm × 1006mm. |
| Weight | The frame is about 24kg; the ultrasonic instrument is about 2.4kg; the instrument battery is 830g; the operation terminal (three-proof tablet computer) is 730g; the trolley equipped with 5 groups of probes is about 1.4kg. |


